Designing With a Hairpin Flower Frog Holder
Stephanie Auville
Hello, my name is Stephanie and I’m not a professional floral designer. I leave that magic to my sister who is *very talented* and has been trained by *very important* celebrity designers. I’m just a regular ol’ flower lover who likes to create special things for my home. Well that, and honestly there’s a lot of pressure to have flowers in the house when your guests know that you’re an owner of a flower farm -AND- the only company in the country that makes flower frogs (also known as kenzans). I had to give the people (reads: in-laws) what they wanted, and I needed it to be easy.
This is why I always use a hairpin flower frog.
When many people think of flower frogs, the first thing that comes to mind is the round pin frogs or vintage glass flower frogs that line the shelves at the local antique store. The hairpin flower holders are unique because they are designed with looped pins that provide amazing stem support and are incredibly easy to use. The pins create a natural thatching (kind of like chicken wire) to hold each stem in place, and it’s the only flower holder that allows you to insert stems horizontally! Learn more about the history of the Blue Ribbon Hairpin Holder here.
If you’re just getting started with flower frogs, here is my basic getting-started guide to creating something that feels professional, without all the pressure.
Step 1: Gather your supplies.
Here’s what you need to create a flower arrangement using a hairpin flower frog:
- A hairpin flower frog. You can find an assortment of styles and sizes in our hairpin store.
- A clean, dry vase that holds water. You can use literally any vase that the flower frog will fit in and that will hold water. Keep in mind that literally anything that holds water can be a vase, so get creative!
- Floral putty. This will keep your flower frog from moving around while you’re designing and moving it to it’s show-off spot (that’s what we call the place where everyone that visits will see it and you can brag about your excellent design skills!) You can get a full roll at our farm store for only $15!
- Water. We’re not sure who needs to hear this, but you need to design flowers into water.
- Snips. Find our (okay, Jess’) favorite snips in the farm shop, but a sharp pair of scissors works just fine!
- Flowers. Grab some flowers from a local farmer, or have some farm-fresh flowers delivered directly to your door from our Virginia farm! I recommend The Farmer and the Frog Box, which comes with 50 stems of American-grown blooms -AND- a hairpin holder flower frog!

Step 2: Secure your flower frog.
Before you get going, be sure that your vase is clean and completely dry. Don’t worry if it’s not flat on the bottom, we’ll cover how to secure your frog in this step.
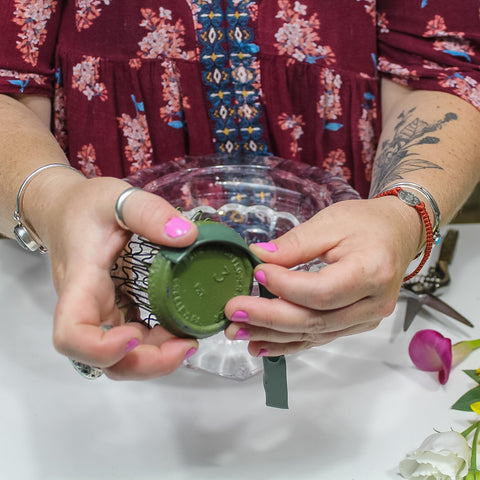
Measure your floral putty and cut enough to go around the entire outside edge of the bottom of your flower frog.
Peel the paper backing off the cut piece of floral putty and press it around the bottom edge of your flower frog so that there’s putty on the side and on the bottom. You don’t need to cover the entire bottom of the frog, we just need enough to create a water-tight seal between the frog and the vase.
Press your flower frog down into the vase. Don’t be shy, give that sucker a good mash to make sure it’s good and stuck. Like we mentioned, it’s ok if the bottom of the vase isn’t flat, you just need to make sure that there’s a nice seal happening all the way around between the base of the frog and the vase.
Do the Dairy Queen test by flipping your vase upside down. Your frog should stay stuck to the bottom of the vase. If it falls, add more putty!
 |
 |
 |
 |
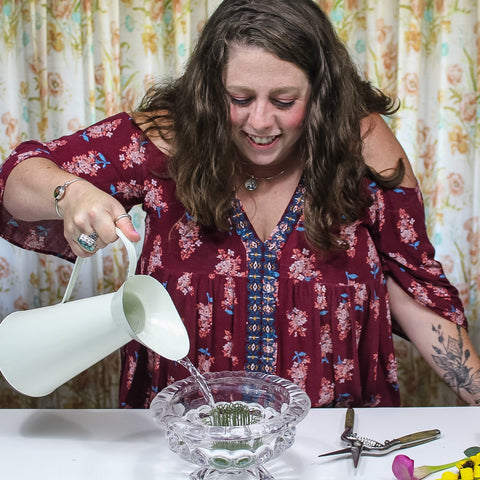
Step 3: Add water to the vase.
If you see air bubbles coming from under the frog, this means that your seal isn’t water tight. If you’re just arranging for your home, you can keep going, but there is a chance the frog might shift a bit while you design or move your final arrangement.
If you’d like to try again, repeat the last step with a new piece of putty, but be sure your vase and flower frog are completely dry or else the floral putty won’t stick.
Step 4: Start designing!
Grab a stem and give it a fresh, angled cut. Then, simply insert the stems in between the looped pins of the hairpin holder. You can insert straight down, or at an angle! We typically start every arrangement with greens so that you have a nice base for your blooms. Next, add larger blooms with thinker stems. As you add more flowers, the stems will create a natural thatching that will hold smaller, more delicate flowers.
 |
 |
 |
 |
Here’s a pro tip for designing - forget about what you *think* it should look like, and create something that’s totally YOU! Arranging flowers is an art, which means there’s no right or wrong outcome. Just make something that you think is beautiful and enjoy it because it’s yours!
As your design takes shape, feel free to move stuff around! Because we’re not using foam, moving your flowers during the design process won’t affect the mechanical structure that’s holding your arrangement together (to learn more about this, read our blog post on the differences between designing in floral foam versus a floral frog.)
There you have it! Creating something special with the hairpin flower frogs is incredibly easy. To see this tutorial in action, watch this video where our resident designer Jessica shows me how to use a hairpin with the Farmer and the Frog Box!
For more design tutorials like this, subscribe to our YouTube Channel!
I hope that you’ve been inspired to create some flower magic of your own with the hairpin flower holders. We are always blown away by the beautiful things that people create with them, so don’t forget to share your creation with us on social media by tagging @harmonyhrvst and using the hashtag #FreshFlowersRule!
1 comment
WOW! Great post.